Table of Contents
ToggleBuilding an in-home movie theater has become more accessible than ever, thanks to advancing technology and a wider range of affordable equipment options. What once required a dedicated media room and five-figure budget can now be achieved in spare bedrooms, basements, or even multi-purpose living spaces. The difference between a good setup and a great one isn’t always about spending more, it’s about understanding how room acoustics, equipment placement, and viewing geometry work together. This guide walks through the essential decisions homeowners need to make, from selecting the right space to optimizing sound and light control, with practical advice grounded in real-world installations.
Key Takeaways
- Building an in-home movie theater is now affordable and accessible in spaces like basements or bedrooms, with success depending more on understanding room acoustics and equipment placement than spending a large budget.
- Room dimensions matter significantly—aim for a rectangular space with a length-to-width ratio between 1.6:1 and 2.4:1 to avoid standing waves that muddy bass response.
- Choose your display based on room size and light control: projectors excel in dedicated dark rooms and offer better cost-per-inch for large screens, while large-format TVs perform better in multi-purpose spaces with ambient light.
- A true home theater requires at least a 5.1-channel audio system with proper speaker placement, including a center channel that handles 60% of dialogue and a strategically positioned subwoofer for balanced bass response.
- Acoustic treatment using absorption panels at first reflection points and bass traps in corners transforms sound quality dramatically, while dark wall paint and motorized blackout solutions eliminate light interference for optimal viewing.
- Position your primary seating 1.5 to 2.5 times the screen width away from the display, and ensure adequate HVAC with low-noise ventilation to keep the room comfortable during extended movie sessions.
What Is an In-Home Movie Theater?
An in-home movie theater is a dedicated or semi-dedicated space designed to replicate the commercial cinema experience, with controlled lighting, optimized acoustics, and large-format video paired with surround sound. Unlike a standard TV setup, a true home theater prioritizes immersion through careful equipment selection and room treatment.
The core components include a large display (projector or TV typically 75 inches or larger), a multi-channel audio system (at minimum 5.1 surround sound, though 7.1 and Dolby Atmos configurations are increasingly common), and light-blocking window treatments or dedicated room darkening. Seating is often theater-style recliners positioned based on optimal viewing angles and speaker placement.
Home theaters range from basic setups in shared living rooms, where a pull-down screen and soundbar provide an upgrade over standard viewing, to fully custom installations with acoustic panels, tiered seating platforms, and motorized systems. The key distinction is intent: the space is designed around the viewing experience, not as an afterthought.
This differs from a media room, which typically serves multiple functions (gaming, casual TV watching, socializing) and may not have the same level of acoustic treatment or light control. A theater space commits to optimized performance, even if it shares duty as a guest room or exercise area.
Planning Your Home Theater Space
Choosing the Right Room
Room dimensions and shape directly impact both audio quality and seating layout. The ideal space is rectangular with a length-to-width ratio between 1.6:1 and 2.4:1, a 12-foot-wide room should ideally be 19 to 29 feet long. Perfect squares and rooms with identical width and height create problematic sound reflections called standing waves, which muddy bass response.
Ceiling height matters for both acoustics and projector mounting. Eight-foot ceilings work for most setups, but 9- to 10-foot ceilings allow for better projector geometry and overhead Atmos speakers without feeling cramped. Basements are popular because they’re naturally dark and isolated from household noise, though moisture control and adequate HVAC are non-negotiable.
Avoid rooms with too many windows unless budget allows for motorized blackout shades or permanent light-blocking solutions. Even small light leaks wash out projector images, especially during daytime viewing. Corner rooms or interior spaces with minimal exterior walls provide better sound isolation, important if running a subwoofer at reference levels.
Evaluate existing wiring access before committing. Running HDMI cables, speaker wire, and power to a ceiling-mounted projector often requires opening drywall or fishing through walls. If the space is above a finished ceiling or has concrete walls, plan for surface-mounted conduit or wireless transmission solutions, which add cost and complexity.
Finally, consider HVAC and acoustics together. Theater equipment generates heat, especially projectors and amplifiers, and a closed room packed with people gets stuffy fast. A dedicated return vent with a low-sone rated inline fan (under 1.0 sone) provides air circulation without the rumble of standard HVAC noise during quiet movie scenes.
Essential Equipment for Your Home Theater
Display Options: Projector vs. Large-Screen TV
The display choice hinges on room size, ambient light control, and budget. Projectors excel in dedicated dark rooms, delivering screen sizes from 100 to 150 inches for far less cost per inch than equivalent TVs. A quality 4K projector starts around $1,500 to $2,500, though ultra-short-throw (UST) models that sit inches from the wall run higher. Lamp-based projectors require bulb replacements every 3,000 to 5,000 hours (around $150 to $300 per bulb), while laser and LED models last 20,000+ hours but cost more upfront.
Projector screens matter. A pull-down white screen works for entry-level setups, but a fixed-frame acoustically transparent screen (starting around $400 for a 100-inch) allows center-channel speakers to mount behind it, improving dialogue clarity and reducing clutter. Screen gain, how much light the material reflects, should match the projector’s brightness. Gain ratings of 1.0 to 1.3 suit most rooms: higher-gain screens introduce hotspotting where the center appears brighter than edges.
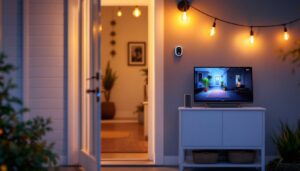
Large-format TVs (75 to 85+ inches) shine in multi-purpose rooms with some ambient light. OLED panels deliver perfect blacks and wide viewing angles but cost more and risk burn-in with static content. QLED and Mini-LED TVs offer high brightness, critical if the room has windows, and handle HDR content well. For home theater installations where budget is tight, a quality 75-inch TV often outperforms a cheap projector, especially if light control is imperfect.
Throw distance calculations are critical for projectors. A standard throw projector needs roughly 1.5 times the screen width in distance, a 120-inch diagonal 16:9 screen (about 104 inches wide) needs around 13 feet from lens to screen. Short-throw models cut that to 4 to 8 feet, and UST projectors need only 8 to 20 inches, ideal for shallow rooms.
Sound System Setup
Audio quality separates a true home theater from a TV with a soundbar. At minimum, invest in a 5.1-channel system: three front speakers (left, center, right), two surround speakers, and one subwoofer. The center channel handles 60% of movie dialogue and should never be skipped or substituted with a phantom center.
Receiver selection drives the system. Look for an AV receiver with enough HDMI 2.1 inputs to support 4K/120Hz sources (gaming consoles, Blu-ray players, streaming devices). Receivers rated for 7.2 channels or higher provide upgrade paths to Atmos without replacing the unit. Power ratings matter: allocate at least 75 to 100 watts per channel for rooms over 200 square feet.
Speaker placement follows specific geometry. Front left and right speakers should form a 22- to 30-degree angle from the primary seating position. The center channel mounts directly above or below the screen at ear height. Surround speakers sit 90 to 110 degrees to the sides, slightly above ear level. Subwoofer placement is more flexible, corner loading boosts output, but mid-wall positions often yield smoother bass response. Run a subwoofer crawl: place the sub in the main seat, play bass-heavy content, and crawl the room’s perimeter listening for the smoothest response, then swap positions.
In-wall and in-ceiling speakers clean up aesthetics but require cutting drywall and fishing wire. They work well for surrounds and Atmos height channels, though front stage speakers benefit from traditional bookshelf or tower designs with better cabinet bracing. If going in-wall, use models with back boxes to isolate sound and prevent it from rattling through wall cavities.
Cable management isn’t optional. Use 16-gauge speaker wire minimum for runs under 50 feet: drop to 14-gauge for longer distances or higher power. HDMI cables should be certified for the bandwidth needed, 18 Gbps for 4K/60Hz, 48 Gbps for 4K/120Hz and 8K content. In-wall rated cables (CL2 or CL3) meet fire codes if running through walls or ceilings.
Wireless surround kits eliminate some cable runs but introduce potential latency and signal dropouts. They work acceptably for rear channels in renovations where fishing wire isn’t feasible, but hardwired connections remain the gold standard for reliability.
Optimizing Acoustics and Lighting
Room acoustics make or break a theater, regardless of equipment cost. Bare drywall, hardwood floors, and large windows create harsh reflections and echo. The goal is controlled reflection: absorb first reflections at side walls and ceiling, diffuse rear-wall energy, and manage bass buildup in corners.
Acoustic panels are the simplest fix. Mount 2-inch-thick fiberglass or mineral wool panels (with fabric wrapping) at first reflection points, the spots on side walls and ceiling where sound from the front speakers bounces toward the listening position. A mirror trick helps locate these: sit in the main seat and have someone slide a mirror along the wall until you see the speaker reflected: that’s the reflection point. Panels typically measure 2×4 feet and start around $40 to $80 each. Plan for at least six panels in a basic setup.
Bass traps in room corners address low-frequency buildup. Floor-to-ceiling corner traps or stacked triangular panels (4 to 6 inches thick) absorb frequencies below 250 Hz that muddy dialogue and overpower midrange detail. These cost $100 to $200 per corner but deliver audible improvement, especially in smaller rooms where bass modes are more pronounced.
Carpeting or area rugs over hard floors reduce slap echo and footfall noise. If the room has existing hardwood, an 8×10-foot rug in the seating area works. Underlayment padding beneath carpet adds absorption.
Lighting control extends beyond blackout curtains. Recessed LED can lights with dimmers (preferably on separate zones) allow task lighting for finding seats without washing out the screen. Avoid placing lights directly above the screen, downward spill creates glare. Rope lighting or LED strips along floor edges or under seating platforms provide safe, low-level illumination during movies. Smart lighting systems synchronized with playback (lights dim when content starts) add convenience, though smart home integrations can introduce compatibility headaches across brands.
Wall color affects perceived contrast. Dark, matte paint (charcoal, deep brown, or black) prevents light reflections from bouncing back toward the screen. Flat or eggshell sheens beat semi-gloss or gloss, which act like mirrors for projector light. The ceiling benefits from dark paint as well, reduces stray light and visually recedes, making the room feel larger.
Projector-specific considerations include eliminating light from indicator LEDs on equipment, exit signs, or standby lights on power strips. A few squares of black gaffer tape over offending LEDs solves most issues without leaving residue.
Seating position optimization ties into acoustics. The primary row should sit 1.5 to 2.5 times the screen width from the display, for a 120-inch diagonal screen (roughly 104 inches wide), that’s 13 to 22 feet back. This distance balances immersion with avoiding visible pixels on 4K content. Second-row seating works if the room allows, but requires a riser platform (typically 12 to 18 inches high) to see over front-row heads. Build risers from 2×10 or 2×12 lumber with 3/4-inch plywood decking, secured to the subfloor to prevent bounce. Carpet the riser and add a toe-kick light strip for safety.
Permits typically aren’t required for equipment installation, but if building permanent platforms or modifying electrical (adding circuits for dedicated 20-amp theater power), check local codes. Most jurisdictions require permits for new circuits and inspection before closing walls.